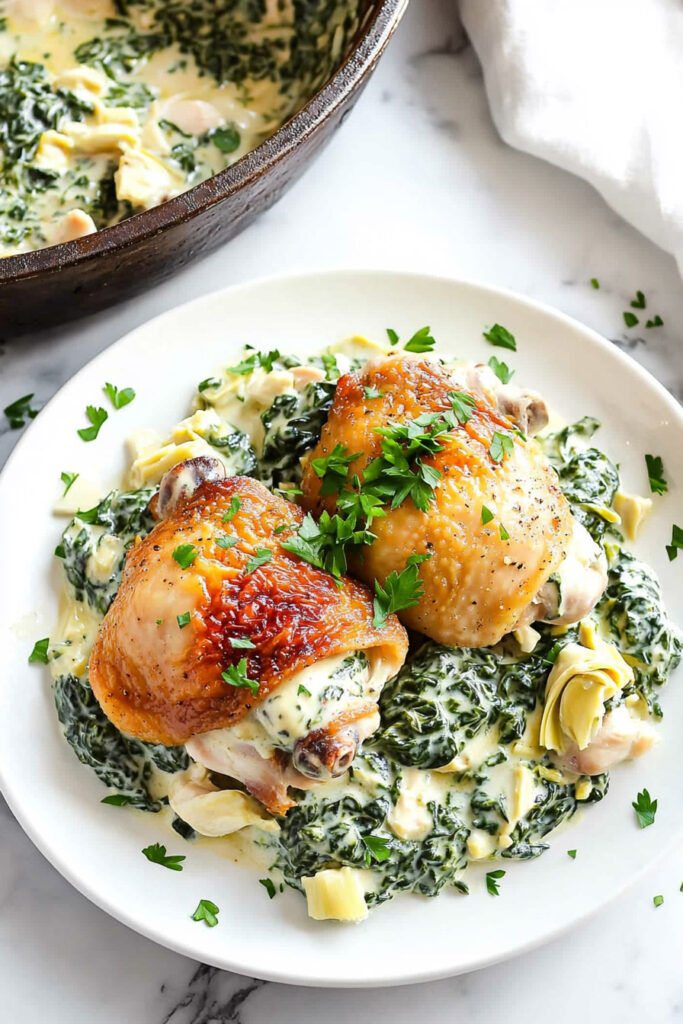
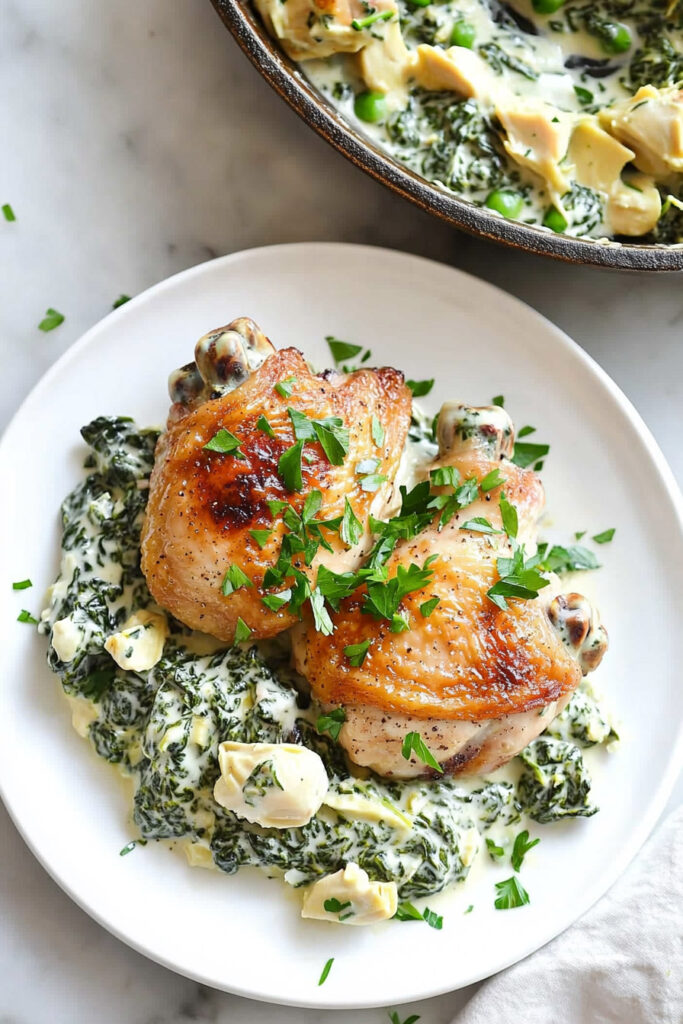
You know that creamy, cheesy spinach-artichoke dip that’s always a hit at parties? Imagine turning that into an easy, healthy dinner. That’s exactly what this Spinach Artichoke Chicken Skillet is—a dish that’s flavorful, filling, and surprisingly simple. It’s a one-pan meal with juicy chicken smothered in a creamy spinach and artichoke sauce. Plus, it’s Paleo, Whole30, and Keto-friendly! Whether you’re cooking for the family or prepping meals for the week, this recipe will leave everyone happy.
Recipe Snapshot
- Prep Time: 5 minutes
- Cook Time: 30 minutes
- Total Time: 35 minutes
- Servings: 6
Why you’ll love it:
- One-pan dish = fewer dishes!
- Packed with protein and veggies.
- Perfect for healthy meal prep.
What You’ll Need
Tools:
- Large oven-safe skillet (cast iron is ideal).
- Mixing bowl, spatula, cutting board, and knife.
No oven-safe skillet? No problem—just transfer everything to a baking dish before popping it in the oven.

Ingredients
The Basics:
- 1 tbsp avocado oil (or olive oil)
- 1.5 lbs chicken thighs or breasts (thighs for more flavor)
- Salt and pepper to season
The Sauce:
- 1 can (14.5 oz) artichoke hearts, drained and chopped
- 1 cup mayo (avocado oil-based for Paleo/Whole30!)
- 1/4 cup nutritional yeast (for that cheesy, dairy-free flavor)
- 3 cups spinach, chopped (fresh or thawed and squeezed if frozen)
- 4 garlic cloves, minced
For the Veggies:
- 1 bunch asparagus, trimmed and chopped
- 6 cups cauliflower rice (or white rice if not Paleo/Keto-friendly)
Optional garnish: a handful of fresh parsley.
How to Make It
Step 1: Prep Your Ingredients
Start by preheating your oven to 350°F. While it’s heating up, take a few minutes to chop the asparagus into bite-sized pieces and prepare the cauliflower rice if you’re not using a pre-packaged option. If you go with frozen spinach or cauliflower rice, make sure to squeeze out as much water as possible—this step is key to keeping your dish from turning soggy. Once your veggies are ready, mix all the sauce ingredients—chopped artichokes, mayo, nutritional yeast, spinach, and garlic—into a bowl. Stir everything together until it’s smooth and well combined.
Step 2: Sear the Chicken
Grab a large, oven-safe skillet and heat the avocado oil over medium heat. While the oil is warming up, season the chicken thighs (or breasts, if you’re using them) with salt and pepper on both sides. Once the oil shimmers, carefully place the chicken in the skillet. Let it cook undisturbed for about four minutes on one side, until a nice golden crust forms. Flip the chicken and cook the other side for another four minutes. Don’t worry about cooking it all the way through just yet—it will finish in the oven later. The goal here is to get that golden sear, which locks in flavor and gives the chicken a gorgeous texture.
Step 3: Assemble the Dish
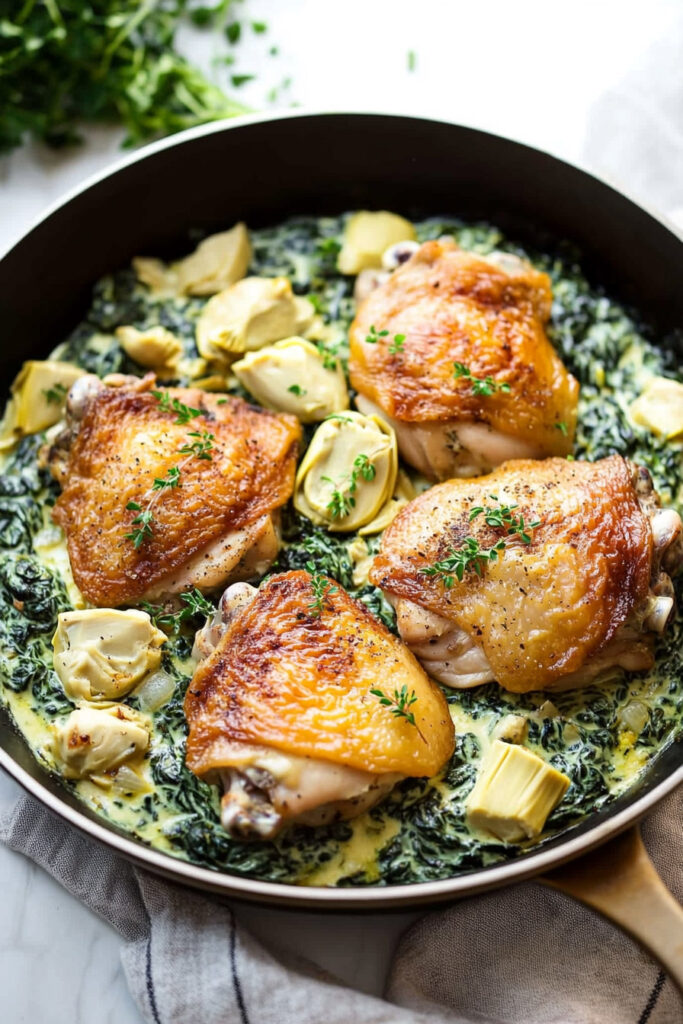
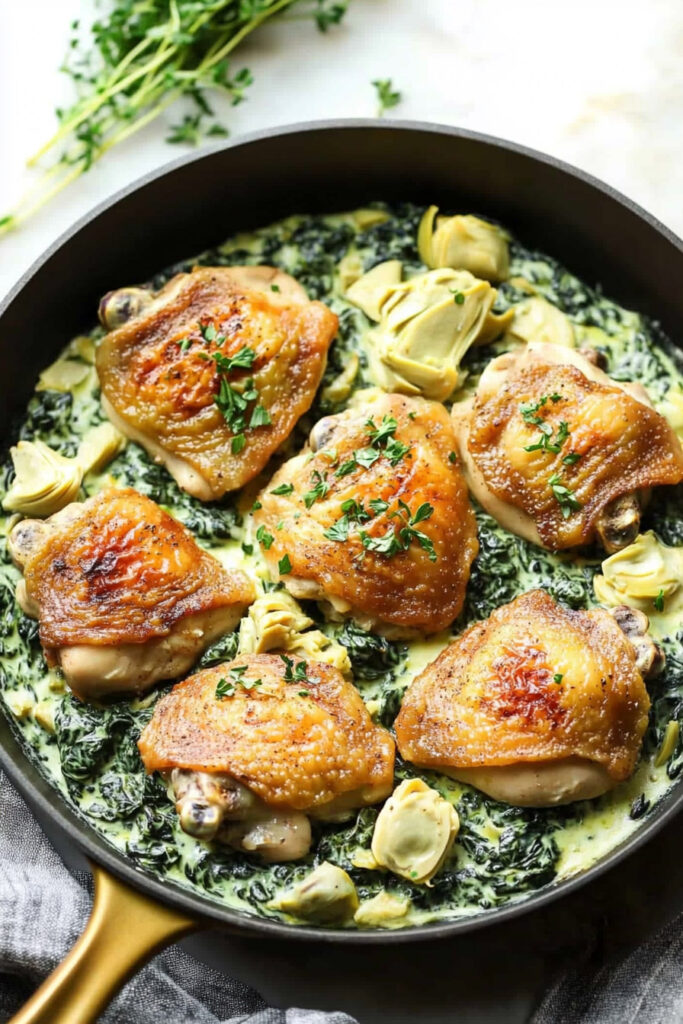
Once the chicken is seared, remove it from the skillet and set it aside on a plate. Keep the heat on the skillet and add the cauliflower rice and asparagus directly into the pan. Stir gently to combine, making sure the vegetables are evenly distributed. Next, take the spinach artichoke sauce you prepared earlier and spread it evenly over the cauliflower rice and asparagus mixture. Finally, nestle the seared chicken pieces back into the skillet, making sure each piece is sitting snugly in the creamy sauce.
Step 4: Bake It
Transfer the skillet to your preheated oven and let it bake uncovered for 15 to 20 minutes. You’ll know it’s ready when the chicken reaches an internal temperature of 165°F. If you’re unsure, use an instant-read thermometer to check—it’s the easiest way to guarantee perfectly cooked, juicy chicken. As it bakes, the sauce will become bubbly, and that’s when you know it’s time to take it out.
Step 5: Serve and Enjoy
Remove the skillet from the oven and let it rest for a minute or two before serving. If you’re feeling fancy, sprinkle some freshly chopped parsley over the top for a bright, herby garnish. Serve the dish straight from the skillet for a rustic presentation, or spoon individual portions onto plates. Either way, the creamy sauce, tender chicken, and flavorful veggies make this a meal everyone will love.
Tips and Variations
Make-Ahead Option:
- You can prepare the chicken and sauce ahead of time, storing them separately in airtight containers. Reassemble and bake for 15 minutes when ready to serve.
Diet Swaps & Customizations:
- For a vegan twist, swap the chicken for tofu or chickpeas.
- Want a spicy kick? Add a pinch of cayenne or sprinkle red pepper flakes into the sauce.
- No asparagus? Use zucchini, Brussels sprouts, or whatever veggies are in season.
Fancy it up:
- Top with toasted pine nuts or a drizzle of truffle oil for a gourmet vibe.
Storage & Reheating
- Fridge: Store leftovers in an airtight container for up to 4 days.
- Freezer: Freeze pre-baked for up to 3 months. Thaw overnight in the fridge before baking.
- Reheating: Warm in the oven at 300°F for 10–15 minutes. Skip the microwave—it can dry out the chicken.
This Spinach Artichoke Chicken Skillet blends indulgent flavors with healthy ingredients. Comfort food without the guilt. Give it a try tonight—you’re going to love how simple and tasty it is. Let me know how it turns out!
PrintSpinach Artichoke Chicken Skillet (Paleo, Whole30 & Keto)

This Spinach Artichoke Chicken Skillet combines the creamy decadence of spinach artichoke dip with tender, juicy chicken for a one-pan meal that’s healthy, hearty, and packed with flavor. Perfect for busy weeknights or meal prep, this dish is Paleo, Whole30, and Keto-friendly, making it a versatile favorite for any table.
- Prep Time: 5 minutes
- Cook Time: 30 minutes
- Total Time: 35 minutes
- Yield: 6 1x
- Category: Main Course
- Cuisine: American
Ingredients
For the Chicken:
- 1 tbsp avocado oil (or olive oil)
- 1.5 lbs chicken thighs or breasts
- Salt and pepper to taste
For the Spinach Artichoke Sauce:
- 1 can (14.5 oz) artichoke hearts, drained and roughly chopped
- 1 cup mayo (avocado oil-based for Paleo/Whole30)
- 1/4 cup nutritional yeast (for cheesy flavor)
- 3 cups spinach, chopped (fresh or frozen, thawed and squeezed dry)
- 4 cloves garlic, minced (or substitute with 1 tbsp garlic oil)
For the Rest:
- 1 bunch asparagus, trimmed and cut into 1-inch pieces
- 6 cups cauliflower rice (or white rice if not following Whole30/Keto)
- Fresh parsley, chopped (optional garnish)
Instructions
- Preheat & Prep: Preheat your oven to 350°F. Chop asparagus into bite-sized pieces and prepare cauliflower rice if not using pre-packaged options. In a bowl, mix all sauce ingredients—artichokes, mayo, nutritional yeast, spinach, and garlic—until well combined.
- Sear the Chicken: Heat avocado oil in a large oven-safe skillet over medium heat. Season chicken with salt and pepper on both sides. Sear for about 4 minutes per side until golden brown. Remove chicken from the skillet and set aside.
- Assemble the Dish: Turn off the heat and add cauliflower rice and asparagus to the skillet. Stir gently to combine and season with salt and pepper to taste. Spread the spinach artichoke sauce evenly over the rice mixture. Nestle the seared chicken on top.
- Bake to Perfection: Transfer the skillet to the preheated oven and bake for 15–20 minutes or until the chicken reaches an internal temperature of 165°F.
- Serve & Enjoy: Remove from the oven and garnish with fresh parsley if desired. Serve hot as-is or alongside a simple green salad for added freshness.
Notes
Serving Suggestions:
- Pair with roasted sweet potatoes or steamed green beans for a balanced meal.
- Serve directly from the skillet for a rustic presentation.
Tips & Tricks:
- For juicier chicken, use thighs instead of breasts.
- If using frozen spinach or cauliflower rice, squeeze out excess moisture to avoid sogginess.
- Use an instant-read thermometer to ensure perfectly cooked chicken.
Storage & Reheating:
- Store leftovers in an airtight container in the fridge for up to 4 days.
- Reheat in an oven at 300°F for about 10–15 minutes or until warmed through.
- For make-ahead meals, assemble everything except baking; store in the fridge for up to two days or freeze for up to three months. Thaw overnight before baking as directed.