There’s just something about biting into a crispy taquito. The crunch, the warm filling, the bold flavors—it’s comfort food at its finest. Traditionally, taquitos are made with corn tortillas stuffed with meat or cheese, then fried until golden. But today? We’re keeping all that goodness while giving it a healthy twist.
Meet Paleo Chicken Taquitos—a grain-free, dairy-free version that’s just as tasty as the classic. These little rolls are packed with seasoned chicken and wrapped in tortillas that crisp up beautifully, whether baked or air-fried. Perfect for meal prep, snack time, or impressing your dinner guests.
The best part? They’re healthier without losing the crunch or flavor. Let’s dive into how to make them!
Quick Recipe Breakdown
What You’ll Need:
- Time: 30 minutes total (20 minutes prep, 10 minutes cook)
- Servings: Makes 12 taquitos—enough for 4 as a main or more as appetizers. Double the batch if you’re feeding a crowd.
- Difficulty: Beginners welcome! Rolling may take practice, but this recipe is super approachable.
Equipment You’ll Use:
- Medium pot for the sauce
- A mixing bowl
- Baking sheet (or air fryer basket!)
- Foil or parchment paper for easy cleanup
- Cooking spray (avocado oil works great)
- Optional: Toothpicks (to keep unruly rolls in place)
What Goes In
Here’s what you need to whip up these taquitos:
- 12 paleo tortillas (cassava flour tortillas are ideal)
- 1 cup chicken broth (unsalted gives you better control over flavor)
- 1/2 cup dairy-free milk (coconut or almond milk both work)
- 2 tbsp tapioca starch (or arrowroot or potato starch—whatever’s on hand)
- 2 tbsp taco seasoning (adjust the spice to your liking)
- 5 cups cooked, chopped chicken breast (rotisserie chicken saves time!)
- 2 cups dairy-free shredded cheese (brands like Daiya work well)
- Cooking oil spray
- Salt to taste
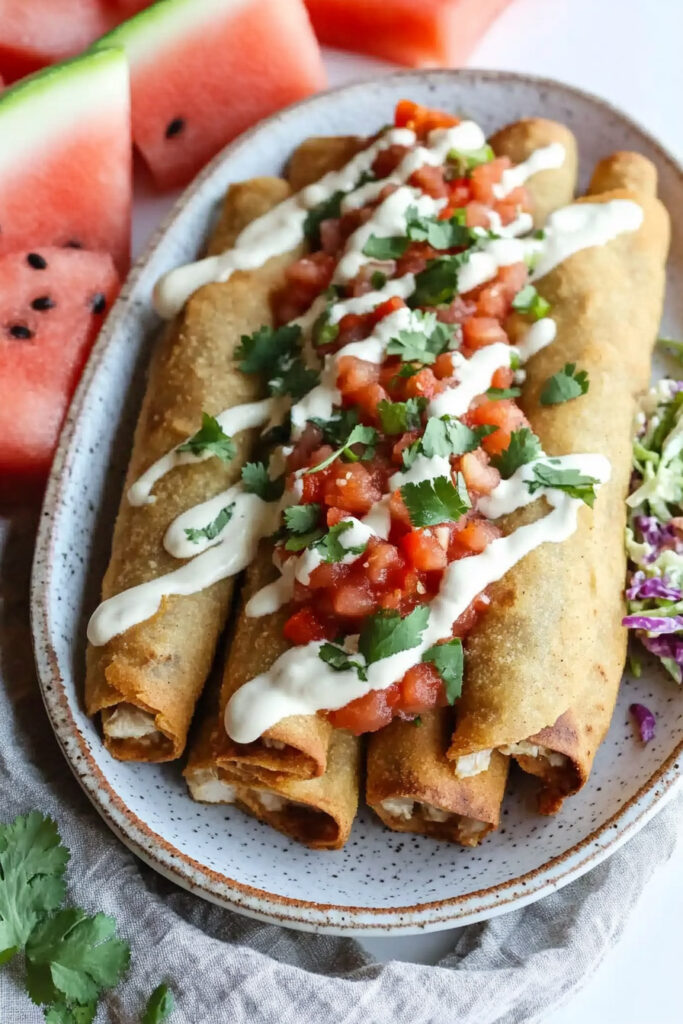
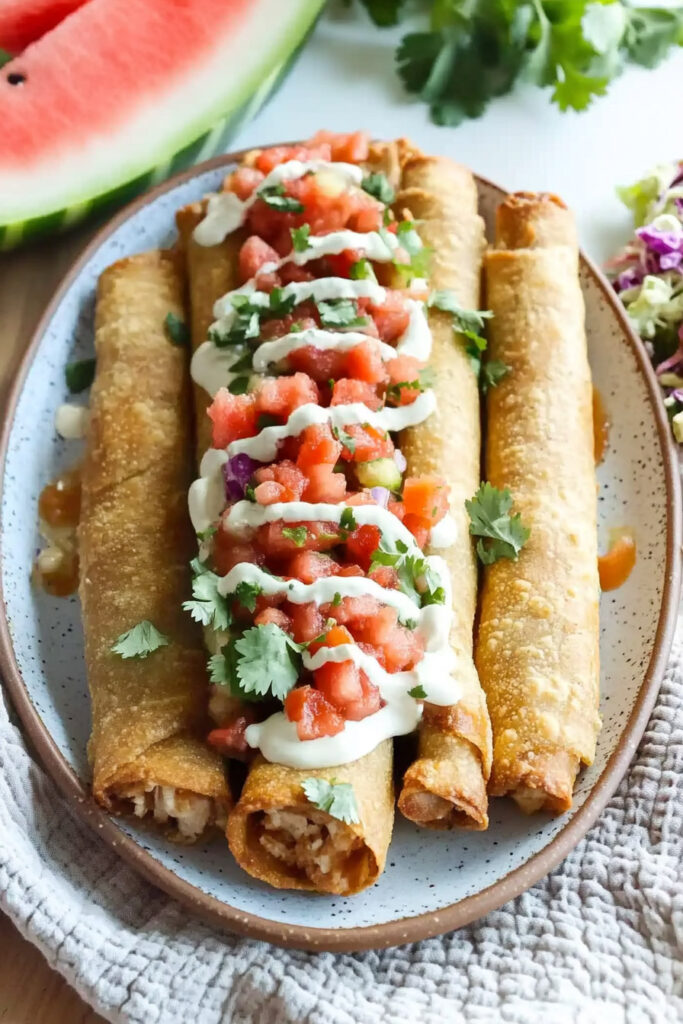
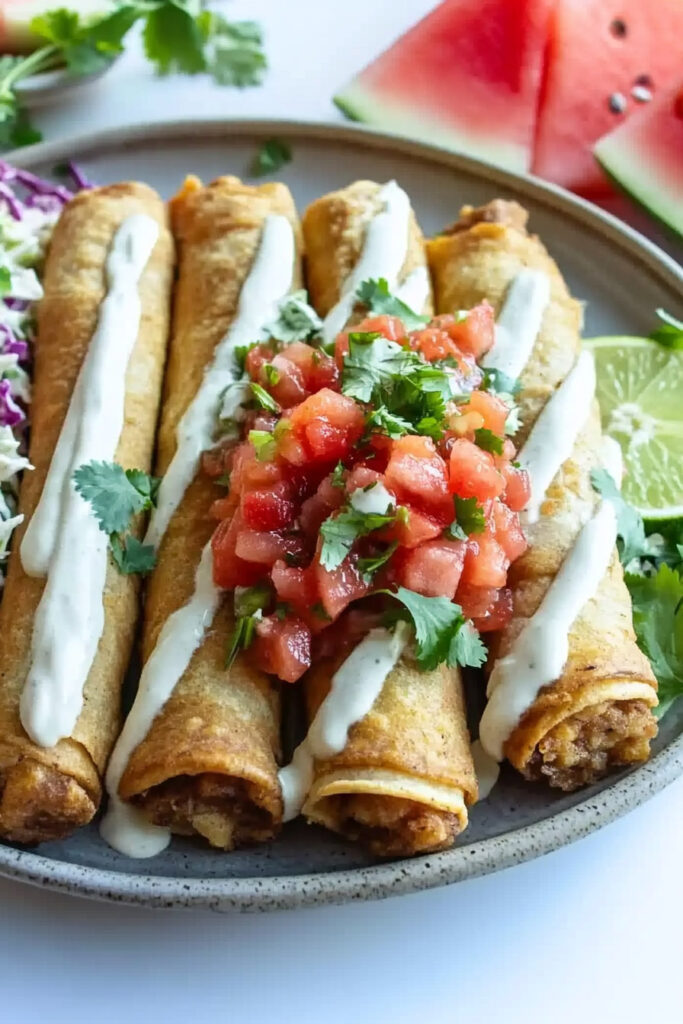
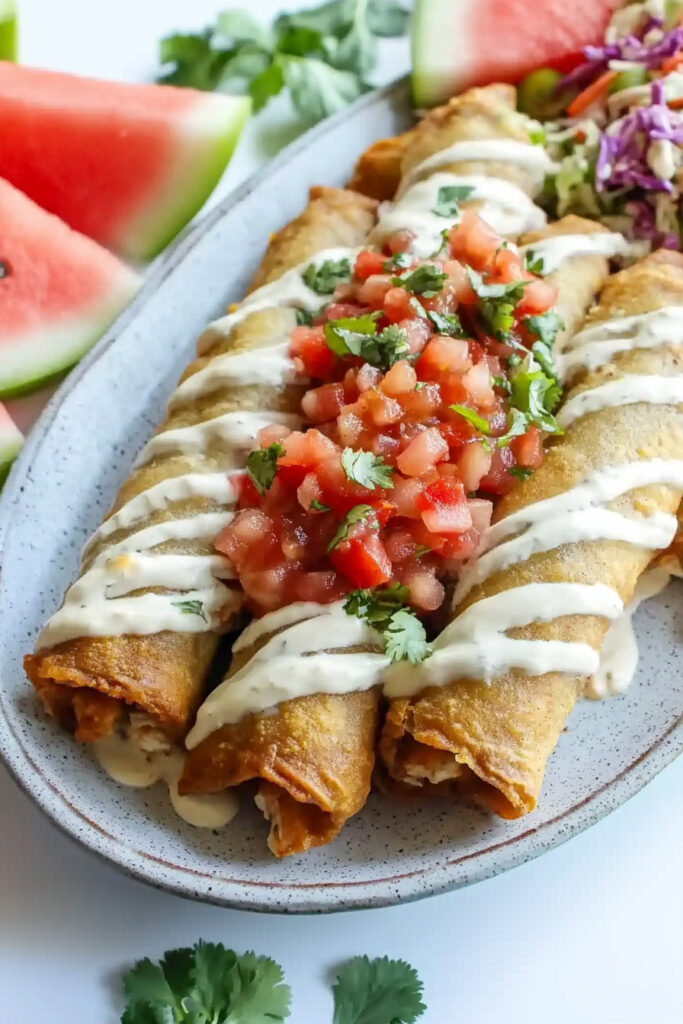
Toppings? Salsa, guacamole, lime wedges, or cilantro dressing make it even better.
Substitutions:
- No paleo tortillas? Almond flour tortillas work too, as long as they’re flexible.
- Don’t eat chicken? Try shredded jackfruit or sweet potato filling instead.
- Regular cheese? Sure, if you’re not dairy-free.
Step-by-Step Directions
Let’s walk through this together, step by step:
Step 1: Make the Sauce
In a medium pot, whisk chicken broth, dairy-free milk, taco seasoning, and tapioca starch. Cook over medium heat, stirring nonstop, until it thickens—about 3 to 4 minutes. You want a smooth sauce that coats the back of a spoon.
Heads-up: Keep your heat low to avoid clumps. Stir, stir, stir!
Step 2: Prep the Filling
In a big bowl, mix your chopped chicken, shredded cheese, and that dreamy sauce. Stir it all together until the filling is thick and evenly coated.
Pro Tip: Make sure your chicken is finely chopped. It’ll make rolling so much easier.
Step 3: Roll the Taquitos
Warm each tortilla in a dry skillet for a few seconds. This keeps them flexible and prevents cracking. Scoop about 1/3 cup of filling onto each tortilla. Roll it up tightly, cigar-style.
Reminder: Don’t overfill! It’ll make rolling tough and could lead to messy breaks during cooking.
Step 4: Cook to Crispy Perfection
Lay your rolled taquitos seam-side down on a baking sheet (lined with foil or parchment). Spray them with cooking oil and sprinkle lightly with salt for that perfect crunch.
- For the oven: Bake at 425°F for 12–15 minutes.
- For the air fryer: Cook at 350°F for about 10 minutes.
Flip them halfway through cooking for even crispiness.
That’s it! You’re done. Time to dig in.
Make It Your Own
Want to customize these taquitos? Here are some fun ideas:
- Spicy kick: Add chopped jalapeños or extra chili powder to the filling.
- Veggie lovers: Toss in diced zucchini or corn for extra texture.
- Vegan option: Swap chicken for jackfruit and use dairy-free cheese.
- Fancy serving: Drizzle with chipotle crema and a sprinkle of fresh cilantro.
Storage & Reheating Tips
Made a big batch? These store beautifully:
- Fridge: Keep cooked taquitos in an airtight container for up to 4 days.
- Freezer: Let them cool, then freeze in a bag or container for up to 3 months.
To reheat, use the oven or air fryer to bring back the crispiness—no sad soggy leftovers here!

How to Serve
Serve these crispy taquitos with your favorite dips. Salsa, guacamole, or cilantro ranch dressing are all winners. Add a squeeze of lime juice for a fresh, tangy finish.
Pair them with:
- Mexican rice
- Refried beans
- A simple salad with avocado
There you have it—Paleo Chicken Taquitos that hit all the right notes: crispy, flavorful, and surprisingly healthy. Whether you’re meal prepping for the week or hosting friends, this recipe is guaranteed to impress. Let me know how they turn out. I can’t wait to hear your twist on this!
How’s that for a recipe refresh? Let me know if you’d like more tweaks!
PrintPaleo Chicken Taquitos

These Paleo Chicken Taquitos are crispy, flavorful, and allergen-friendly, making them a perfect healthy twist on the classic Mexican dish. Packed with tender chicken and a creamy dairy-free filling, they’re baked or air-fried to golden perfection. Serve them with salsa or cilantro ranch for a crowd-pleasing meal or appetizer!
- Prep Time: 20 minutes
- Cook Time: 10 minutes
- Total Time: 30 minutes
- Yield: 4 people (makes 12 taquitos) 1x
- Category: Main Dish/Appetizer
- Cuisine: Mexican
Ingredients
- 12 paleo tortillas (e.g., cassava flour tortillas)
- 1 cup chicken broth (unsalted preferred)
- 1/2 cup dairy-free milk (coconut or almond milk works well)
- 2 tablespoons tapioca starch (or potato/arrowroot starch)
- 2 tablespoons taco seasoning
- 5 cups finely chopped steamed chicken breast
- 2 cups dairy-free Mexican or cheddar cheese (shredded)
- Cooking oil spray (avocado oil recommended)
- Salt, to taste
Optional toppings: Salsa, cilantro ranch dressing, guacamole, lime wedges
Instructions
Step 1: Make the Sauce
In a medium pot over medium heat, whisk together chicken broth, dairy-free milk, taco seasoning, and tapioca starch. Stir continuously until the mixture thickens into a smooth sauce (about 3–4 minutes). Remove from heat.
Step 2: Prepare the Filling
Combine the sauce, chopped chicken breast, and shredded dairy-free cheese in a large bowl. Mix until evenly coated and creamy.
Step 3: Assemble Taquitos
Warm tortillas briefly in a dry skillet to make them pliable. Place about 1/3 cup of filling down the center of each tortilla. Roll tightly into a cigar shape and place seam-side down on a foil-lined baking sheet or air fryer basket.
Step 4: Bake or Air Fry
Spray taquitos generously with cooking oil spray and sprinkle lightly with salt for crispiness.
- Oven Method: Bake at 425°F for 12–15 minutes until golden brown and crispy.
- Air Fryer Method: Air fry at 350°F for about 10 minutes until crispy.
Serve hot with salsa or cilantro ranch dressing on the side.
Notes
Serving Suggestions:
Pair these taquitos with Mexican rice, refried beans, or a fresh green salad topped with avocado slices for a complete meal. Garnish with fresh cilantro and lime wedges for added brightness.
Tips & Tricks:
- Warm tortillas before rolling to prevent cracking.
- Don’t overfill the tortillas to avoid tearing during assembly.
- Flip taquitos halfway through cooking for even crispiness.
Storage & Reheating:
Store cooked taquitos in an airtight container in the fridge for up to 4 days. Reheat in an oven at 350°F for 10–15 minutes or in an air fryer at 350°F for about 5 minutes. To freeze, let taquitos cool completely before storing in a freezer-safe container for up to 3 months. Reheat directly from frozen using an oven or air fryer.

One Comment